Color Infrared Photos
It is possible to fly the entire state of Alaska from the fourth floor of the Federal Courthouse in downtown Anchorage. Some years ago, the BLM undertook a massive project to photograph the state of Alaska with color infrared film from high-altitude aircraft.
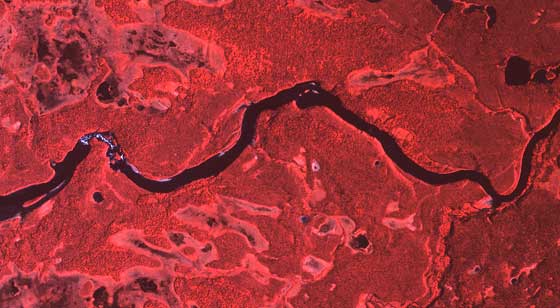
The resulting high-resolution Color Infrared Images (CIR) are excellent for studying terrain and vegetation types, identifying wildlife habitat, figuring out river hazards such as sweepers, logjams, white water and the like. The resolution on them is so sharp you can see individual trees.
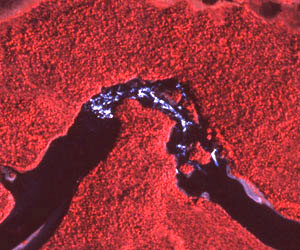 CIR Images
The image to the left, a clipping from the image at the head of this page, shows a section of whitewater on the Nuyakuk River in western Alaska. This is comprised of a section of exposed rocks and surrounding hydraulics, followed by a sharp turn to the right, which is marked by a narrow chute with more exposed rocks and hydraulic hazards. Areas like this are extremely dangerous to floaters, and a look at the CIR images showed details the maps would not.
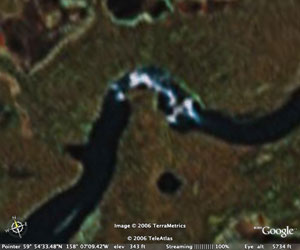 Google Earth
Many folks are using Google Earth to look at Alaska's terrain and vegetation, but at this writing, the images are not nearly as sharp as the CIR images. The image to the left is the same area, from Google Earth. Though the whitewater is visible, much detail is missing; detail that has immense value to rafters floating this section. It is also worth noting that at the time the Google image was taken the water was at a different level, and shows whitewater in places the CIR does not show it.
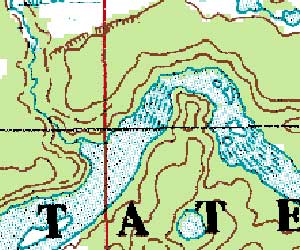 USGS Topo Maps
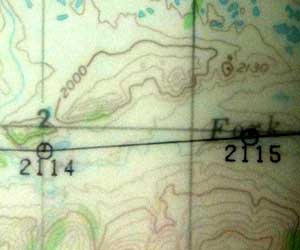
This is a screen shot of a USGS 1:63,360-series topographic map, of the same area in question. Though the map shows the whitewater section, highlighted by wavy lines, the CIR image does a much better job of showing you what the area actually looks like. Additionally the topo map completely misses the whitewater that exists just around the corner in the narrow chute. Note that the river is flowing from left to right in these images.
The details visible on the CIR images are a windfall for anyone traveling in Alaska's remote places. Hunters, fishermen, hikers, backpackers, rafters and kayakers can all benefit from this great resource.
How Does it Work?
 The images were taken by high-altitude aircraft that overflew the state on mostly east-west flight paths. These flight paths have been plotted on clear film, with dots along the flight path that each represent a photograph. The films are overlaid on top of a USGS 1:250,000 series topo map. By looking through the film to the map it is possible to plot the exact coverage area for each photo. Each flight path and image are identified by a series of numbers. These numbers are used to locate the precise image out of a filing system. The actual images are on clear acetate films that have been placed in clear protective sleeves for viewing.
Viewing and Understanding CIR Images
At this writing the CIR images of Alaska are not available online. They are, however, physically located in both Anchorage and Fairbanks, at the addresses listed at the bottom of this article. To view them you must visit one of those locations. Alternatively, 12" x 12" printed copies may be ordered from either office for $25 per image. Note that these will not be transparencies like the originals, but printed on high-quality photo paper. The images on this page came from a paper copy that was scanned into digital format.
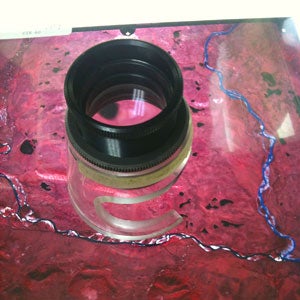 The tremendous detail available on CIR images is useless without magnification. And because they are printed on clear film, they work best if light is projected through them. Therefore the best method for viewing them is to place an image on a light table and view it under magnification. Two methods of magnification are the photographer's lupe and a stereoscope. For quick general scans of the images, the lupe is fine. But for close study and for ascertaining elevation gains and such, nothing beats the stereoscope. Here's how it works. Place two adjacent images next to each other on the light table (remember that each image overlaps the one before and after it), and move them back and forth while looking through the eyepieces of the scope until the two images line up. The result is a 3-D look at the area; high ground seems to "leap" up at you, cut banks at the edges of riparian zones stand out in clear relief, and hills are easily discernable from the surrounding flat areas. It should be noted that the stereoscope exaggerates the altitude gain.
Because the images are infrared, it takes some expertise to distinguish one type of vegetation from another, what ice looks like, what water looks like (most of the time it's black), what tundra looks like and so forth. The staff in each of the offices in Anchorage and Fairbanks can assist you with this until you get the hang of it. You're mostly looking for color and texture. For example, smooth brighter reds might be willows or alders, whereas bumpy maroon patches could be birch or cottonwood trees. If a tree has a long pointed shadow, it's probably a black spruce and it's likely the photo was taken later in the year when the sun was low on the horizon (hence the long shadow). Gravel bars along rivers usually show up as smooth gray and swampy areas are a darker color but smooth texture.
So What?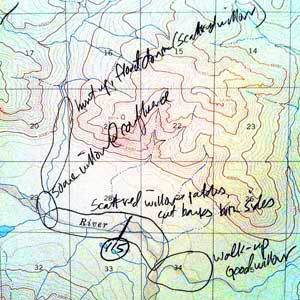
Knowing what to do with the information is as important as knowing how to find it. When you go to Anchorage or Fairbanks to view the CIR images, bring your 1:63,360-series USGS topo maps with you, together with a pencil or a ballpoint pen to write on your maps. Don't use a felt marker or any other pen that may bleed out or smear if it gets wet in the field. Float hunters will want to start with images near the headwaters of the river they plan to float, marking likely locations as they work their way down the drainage to the take-out area. Look each image over carefully for access points, river hazards, high ground that might offer glassing opportunities, inlet streams that might hold schools of salmon (this is where the bears will be), vegetation types, old cabins and so forth. Mark these areas on your maps and you'll have details impossible to obtain without physically going there.
Where to Find CIR Images?
There are two places in Alaska where these images are most accessible to backcountry travelers:
Anchorage
222 W. 7th Avenue #13
Anchorage, AK 99513-7504
1 (907) 271-5960
The Anchorage office works best if you go there and talk to the folks in Suite #13 and tell them you'd like to look at the color infrared images. The images are actually stored and viewed on the 4th floor of the building (it's the Federal courthouse building). They can direct you to the location. Light tables are available, as are stereoscopes and lupes, though you might need to ask for assistance in setting these up.
Fairbanks
Geophysical Institute, University of Alaska
930 Koyukuk Drive, Univ. of Alaska
Fairbanks, AK 99775-7320
1 (907) 474-6166
The Fairbanks office not only has the CIR images, they also sell all the USGS printed topo maps. So you don't need to buy your maps in advance; simply go there and purchase your maps, then ask the staff if they could pull the relevant films for you to view. Light tables are available, as are stereoscopes and lupes for public use. These tools allow you to see the details you need. If you already know what area you need, you can call ahead and they will pull the films and have them waiting for you.
The color infrared images are an indispensable tool in trip planning, whether you're rafting a remote river, hiking the back-country, hunting, or fishing. The time you spend "flying the state" from that room will pay big dividends in the field.
What's next in Alaska hunt planning?
The maps are essential to your planning process, but you still have a lot of questions. Where do you go from here?
Getting Started
Start at the beginning with an orientation to the planning process, using one of three different planning methodologies.
Hunt Planning Services
Do you need help planning your hunt? If so, check out our Hunt Planning Services. We offer complete top-to-bottom assistance with all aspects of your float, drop, or road-based hunt.
Hunt Planning Timeline
This section outlines all the major steps in the hunt planning process, together with a time frame in which they should be accomplished. Though not locked in stone, it should give you a pretty good idea of what is involved in planning an Alaska hunt.
Choosing a Hunt Location
A critical aspect of planning your hunt is choosing the right location. This section walks you through the entire process of area selection, starting with understanding the regions of the state and breaking it down into smaller pieces to help you decide the best place for your hunt.
Resources
We've listed some books and DVDs for you on this page, but at some point you need to do some research with real people. Who do you talk to? What kinds of questions do you ask? How can you avoid time-wasting mistakes. We explore all that and more in our Hunt Planning Resources section.


